Image Manager
Download: 
What is Image Manager?
One of the tools many web users love is the Image Manager. With it you can view, modify, resize, and even convert images right from within the web-based control panel (cpanel).
To start using Image Manager, login to your cPanel installation and navigate to the “Advanced” section. You should see the “Image Manager” button there. Click on it, and you will be presented with three tools: Thumbnailer, Image Scaler, and Convert an Image Format.
Thumbnailer
With thumbnailer you can create thumbnails: smaller versions of the images already found on your website. Simply follow these steps:
- Click the “Thumbnailer” link
- Navigate through the list of folders by clicking on the icons (not the links) and find the one containing your images
- When you find the correct folder, click the text link next to the icon
- Choose the scaling percentage and determine if you want to keep the aspect ratio
- Click “Thumbnail Images”
Image Scaler
While thumbnailer is designed for small images, image scaler can make your images any size you want. To use the tool, do the following:
- Click “Image Scaler” from within Image Manager
- Click the folder icon that corresponds with the folder you want
- Click the text link of the image you want to scale
- Type in the new dimensions or percentage
- Enter the name of the new file
- Click Scale Image
Convert an Image Format
Using this tool, you can convert images from one format to another (i.e. png to jpg).
- Click “Convert an Image Format”
- Click the folder icon of the image directory
- Click the link of the image you want to convert
- From the dropdown menu, choose the new format
- Click “Convert”
TUTORIAL
Step by Step Instructions on how to convert a photo you have taken on a good digital camera so that it will look good in your website.
This is a simple process suitable for anyone who is not trained in graphics using the tools described above.
Step 1. Find out where your server stores the images to be used in your website? In a Google Chrome Browser, right click on any image in your site and activate “Inspect Element”. The highlighted html code will precisely name the path to the folder that stores your site images. It will also show you a small version of your image together with the pixel size.
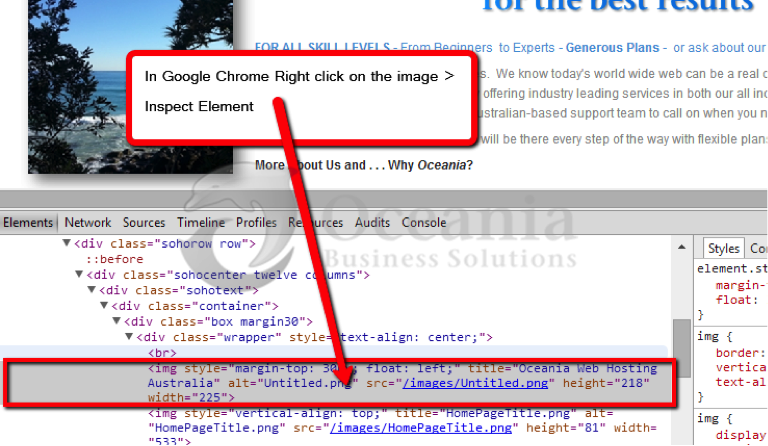
FIG 1. How to find where an image is stored.
- EXAMPLE A. It may say the “img src =” ( source) of the image is to be found here: /images/Untitled.png which means an image (218 x 225 px) called Untitled.png exists in /images folder.
- EXAMPLE B. It may say something like:
http://yourdomain.com/wp-content/uploads/2014/07/mylogo.jpg In this case the images are stored in the folder /wp-content and you will have to drill down several layer until you reach the subfolder /07 which is where you will find the images are stored.
Step 2. Using cpanel >> File Manager create a new folder under the public_html Directory called images_originals
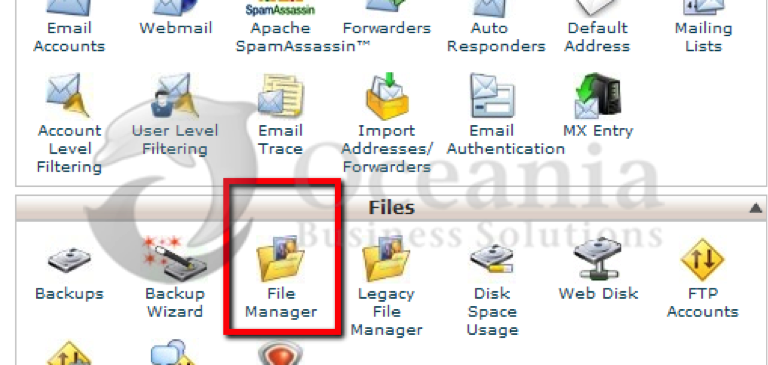
FIG 2a. File Manager on home page of cpanel.
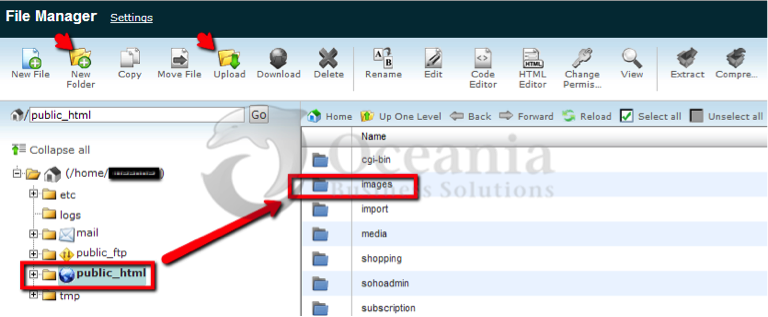
FIG 2b. File Manager Settings and Folder Tree
Step 3. Upload your original photo into the folder you have created called images_originals. It will possibly have a name like DSCF1483.jpg
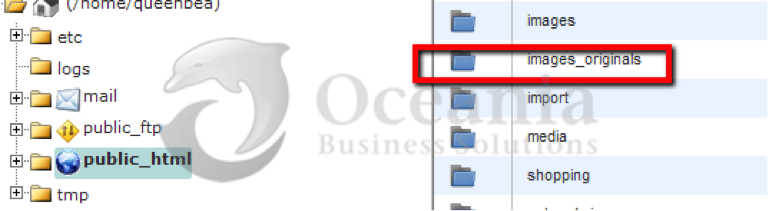
FIG 3a. Newly created images-originals folder
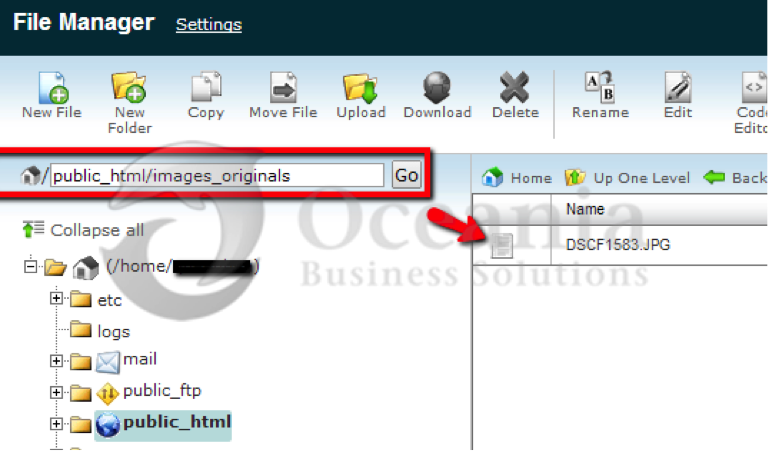
FIG 3b. Uploaded photo located in /images_originals folder.
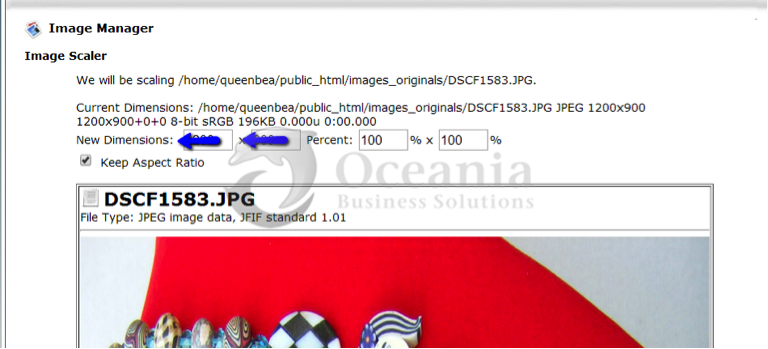
Step 4. Use the cpanel >> Image Manager >> Image Scaler to re-size your photo to something that will fit in with your webpage’s dimensions. If your website is 1200 pixels wide then your image should not be greater than 1200 pixels wide.
Step 5. If you wish to Convert the image you can do so using the Convert Format tool. Consider converting your photos to .jpg to conserve file size.
Step 6. When you rename the original resized photograph you should make sure you give it a useful name ( eg SampleProduct01.jpg) and using cpanel > File Manager rename both the image and the folder that is reserved by your web software for images.
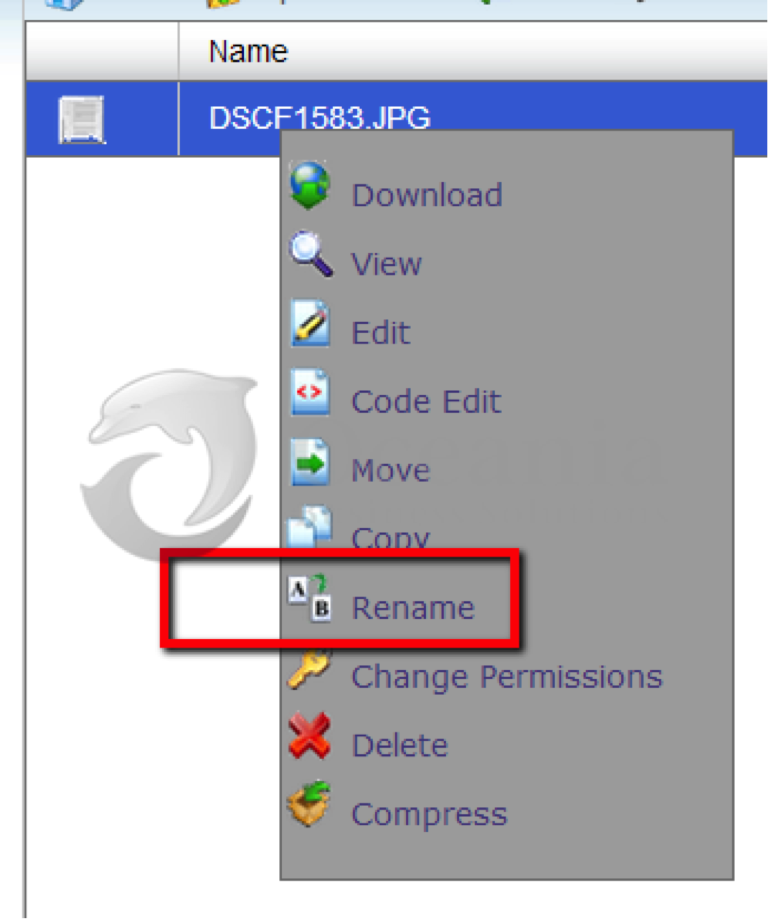
FIG. Right Click on file name and activate “Rename”
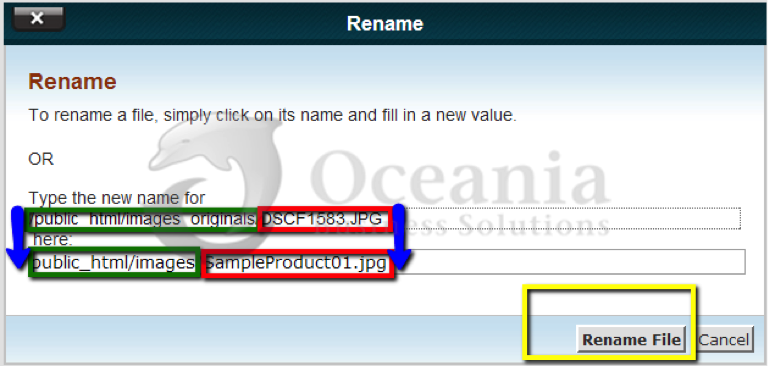
FIG. Be sure to rename the folder as well as the image’s name
Notes:
- The best image format to use online is JPEG, followed by PNG or GIF.
- JPEG (.jpg) – is perfect for web work because jpg files reduce the file size (smaller files load faster) and only a small loss in quality. The best choice is ‘Baseline Optimised’ if your software requires you to choose.
- The image you have resized can often be further re-sized within your site building software to fit the container on the webpage. In some cases you specify the size or in other cases you can use handlers to “fit” the image into the space you want.
- Resizing within your site building software is most successful when you go from a large image down to a smaller one.
- In situations where you have a number of items to display (all of a uniform size) consider thumbnailing the folder so that the thumbnail image is the right size for you webpage “spacing”. A thumbnail will give the viewer the opportunity to click to see a larger image.
- If you are uploading many images which you wish your viewers to be able to enlarge from a thumbnail (which would open in a new window) you should scale the image (see Step 4.) to a suitable size for your viewers.

