Configure Email in Outlook 2016
Download: 
Follow these simple steps to configure your email account in Outlook 2016.
You must first log into your cPanel to create the email account.
Once you have created the email account, you can follow the steps below.
These settings are similar in older versions of Outlook as well if you are familiar with the interface to add new account.
-
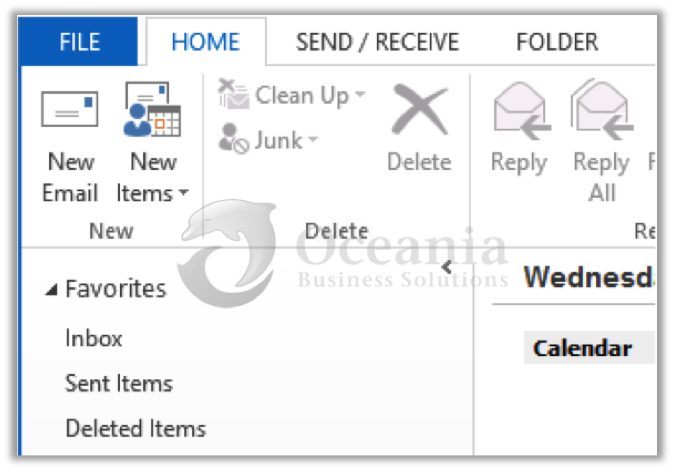
- Click FILE on the menu
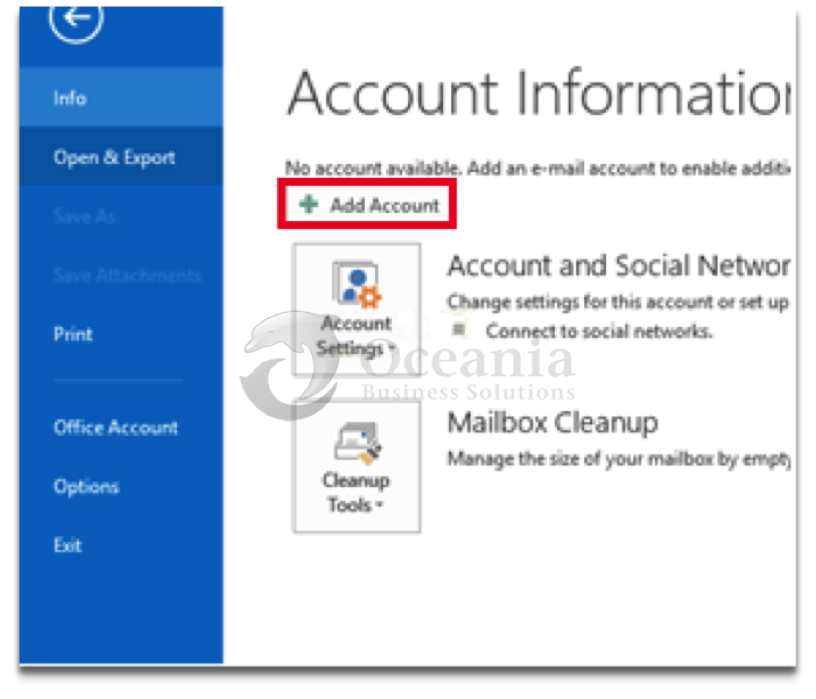
- Click on the button [+ Add Account]
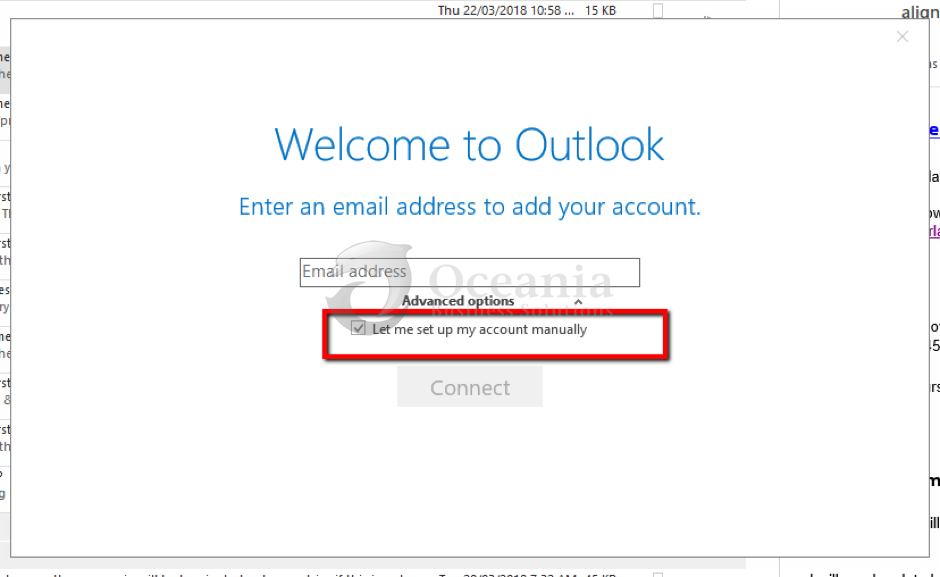
- Click Advanced Options and tick box to Let me set up my account manually.
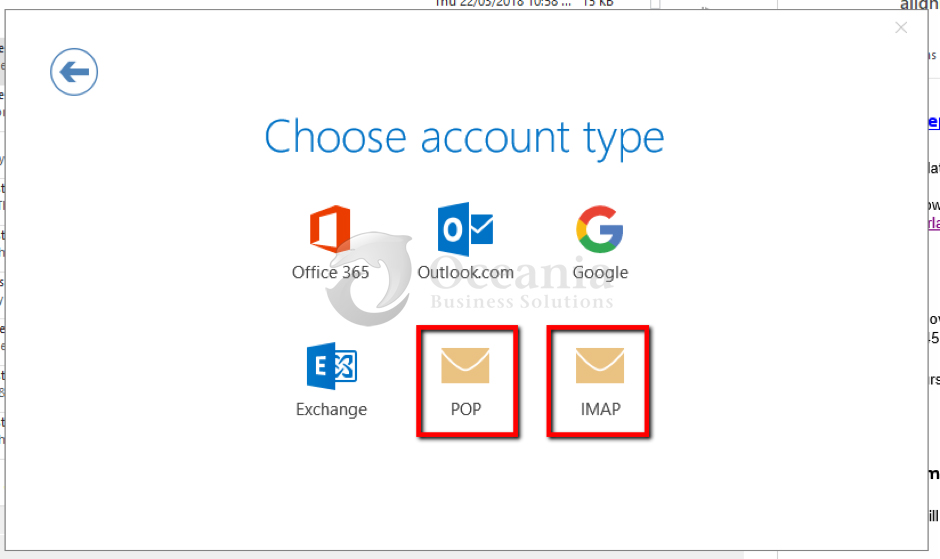
- Select (o) POP or IMAP.
You will find the information for your email account that you created in cPanel under Set Up Mail Client for your email address:
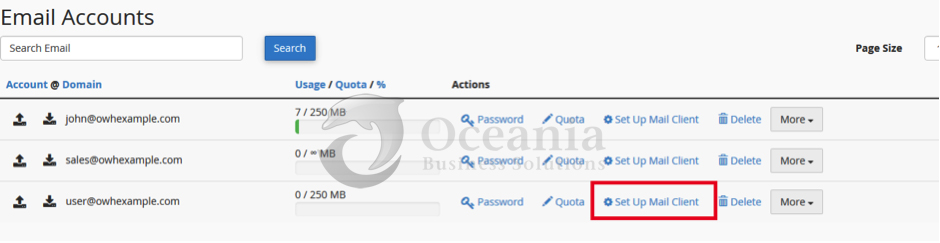
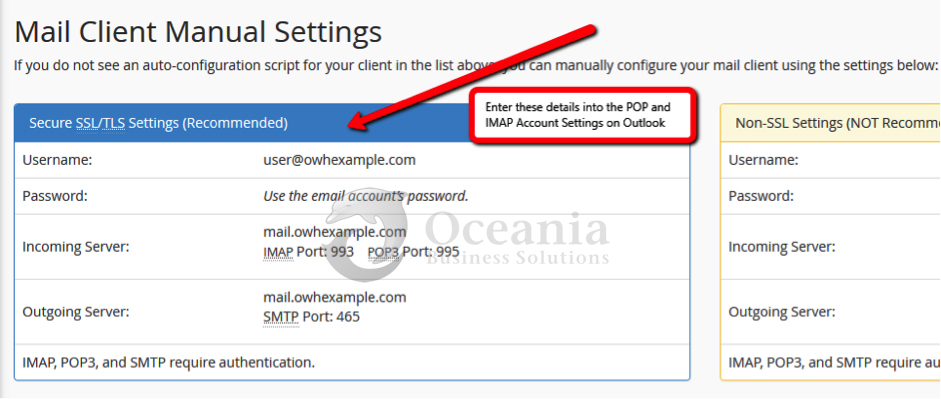
- This will display the settings to enter into the POP and IMAP Account Settings Window:
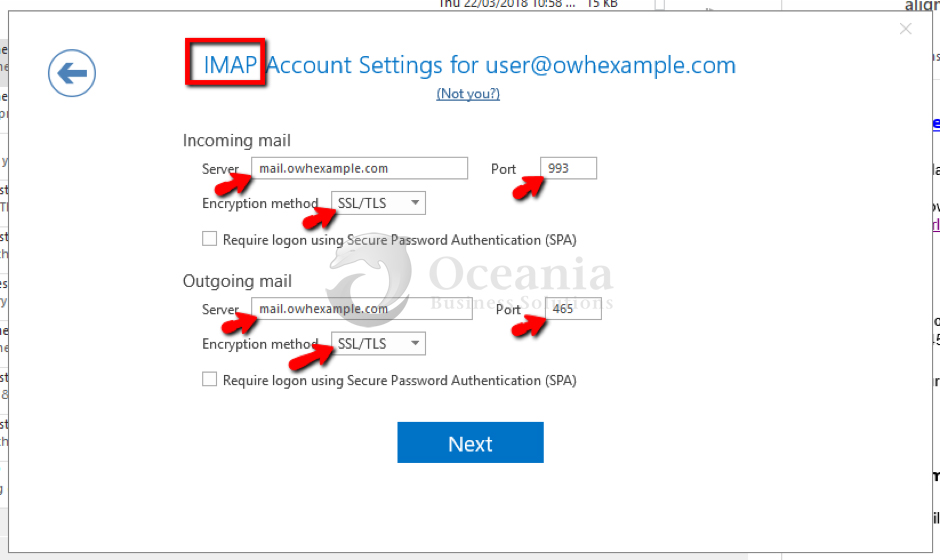
IMAP
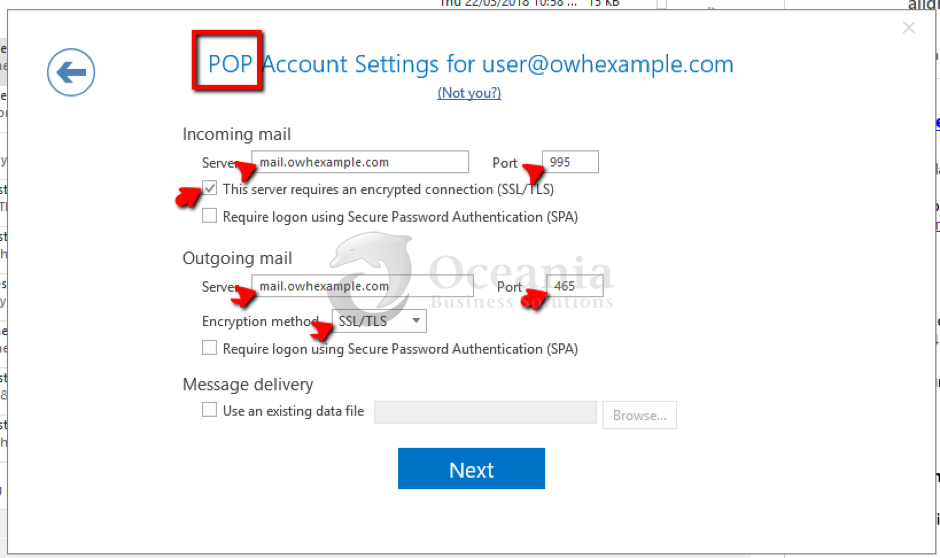
POP
- Click FILE on the menu
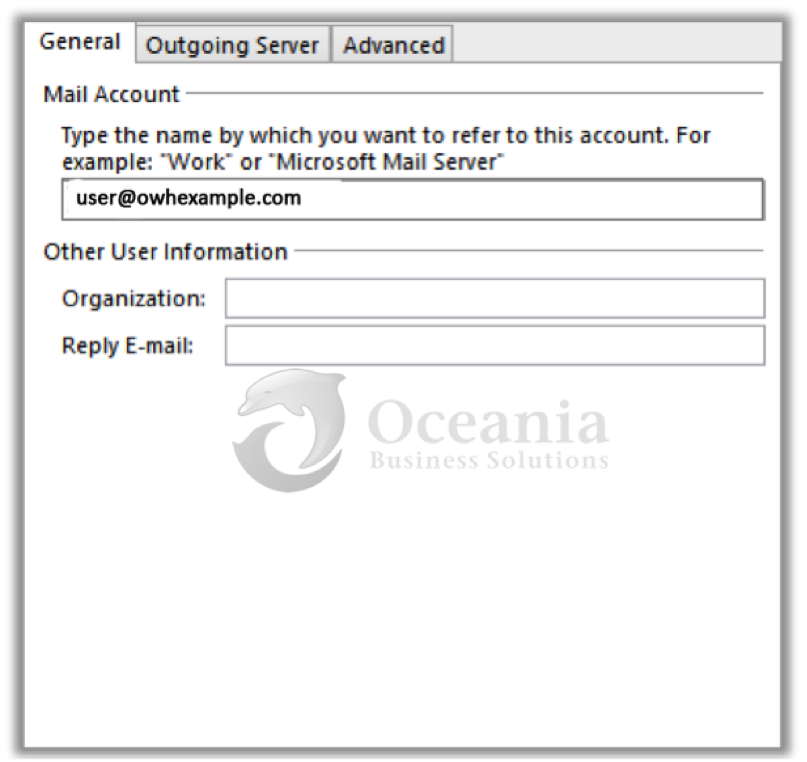
- User Information
- Your Name: This is the name you want to use for yourself
- Email Address: This is the email address that you created in cPanel. It is in a format like user@owhexample.com
- Server Information
- Account Type:
POP3 (select POP3 if you want to download email to your computer, select IMAP if you want to keep emails on the server and want to access it from other computers.
IMAP will use more disk space and it will keep growing as more emails are stored on the server).
Note Re ACCOUNT TYPE- If you are a user with a single device, POP3 is suitable protocol. If you need to keep a copy of mail on the server so you can access via Webmail you can check the appropriate box Leave a Copy of Messages on Server in your Mail Client.
It is not recommended to Leave a Copy of Messages on Server with POP3 for use with multiple devices. Instead please configure your account as an IMAP - Users who download mail to several devices we recommend IMAP for all devices.
You can search “how to change my POP accounts to IMAP: to learn how best to make a change for your particular situation.
- Incoming mail server: mail.domainname.com
you can find this in your cPanel under Configure Email Accountscreen. - Outgoing mail server (SMTP): mail.domainname.com
same as incoming mail server above from Configure Email Account screen in cPanel
- Account Type:
- Logon Information
- User Name: Your email address again in the format of user@owhexample.com
- Password: Your email password
- Click [More Settings … ] button and continue
- You can change the email to an easy to remember identity e.g. Work Email etc.
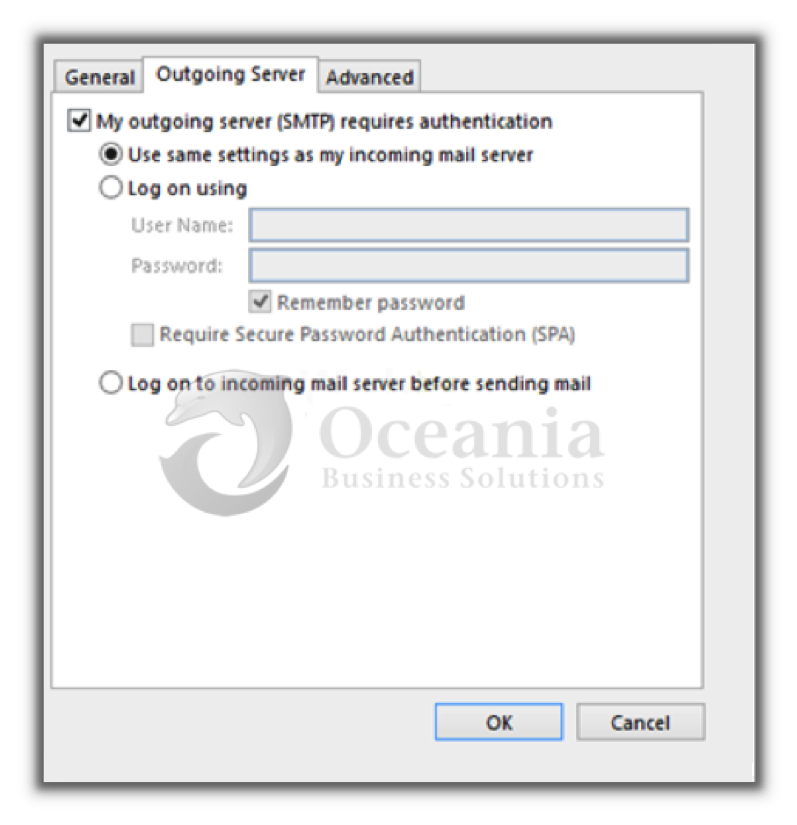
- Click on Outgoing Server tab
- Select the check box [v] My outgoing server (SMTP) requires authentication
- And select (o) Use same settings as my incoming mail server.
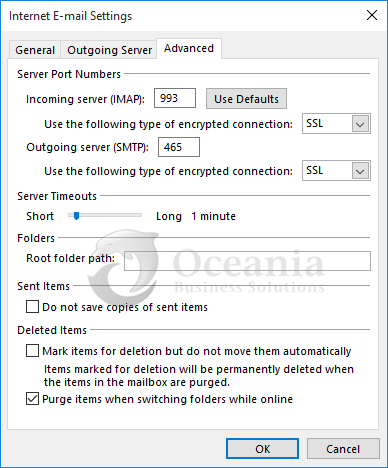
- Click Advanced tab and enter the following values:
- Incoming server(POP3): 995 or 993 if you are setting up an IMAP account
- Select [v] This server requires an encrypted connection (SSL)
- Outgoing server (SMTP): 465
- Use the following type of encrypted connection: SSL
- Click [ OK] and Click [ Next ] and this will test incoming/outgoing server for email and finish setting up the account in Outlook 2016.

